코드 작성하기 완성된 프로젝트는 깃허브에서 다운로드 받을 수 있습니다. https://github.com/JaewonAC/mpuServo1
그래들 설정 dependencies에 다음을 추가합니다.
dependencies { ... provided 'com.google.android.things:androidthings:0.5.1-devpreview' compile 'com.google.android.things.contrib:driver-pwmservo:0.3' compile 'com.mechasolution:mpu6050:0.2' } 
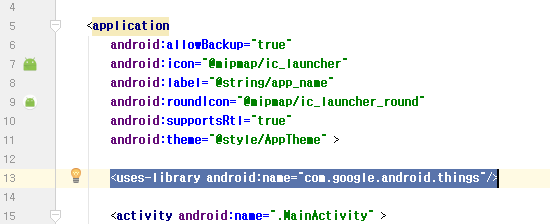
매니페스트 설정 아래와 같이 <application .... >이 끝나는 부분에 아래 코드를 입력합니다. <application> <uses-library android:name="com.google.android.things"/>
... </application> 
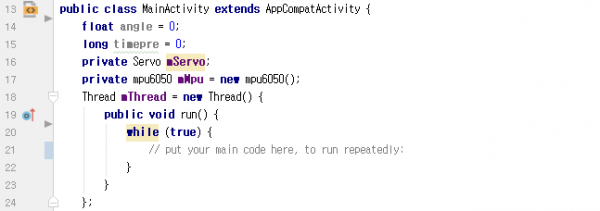
서보 모터 제어를 위해 Servo 클래스 객체와 MPU6050의 값을 읽어오기 위해 mpu6050, 이들을 주기적으로 사용하기 위해 쓰레드 클래스 객체를 선언해줍니다. 매번 측정되는 각도는 angle에 저장되며, 적분에 사용하기 위해 지난 번 루프의 시간을 timepre에 저장합니다. While문 내부는 후에 채우도록 하겠습니다.
float angle = 0; long timepre = 0; private Servo mServo; private mpu6050 mMpu = new mpu6050(); Thread mThread = new Thread() { public void run() { while (true) { // put your main code here, to run repeatedly: } } }; 
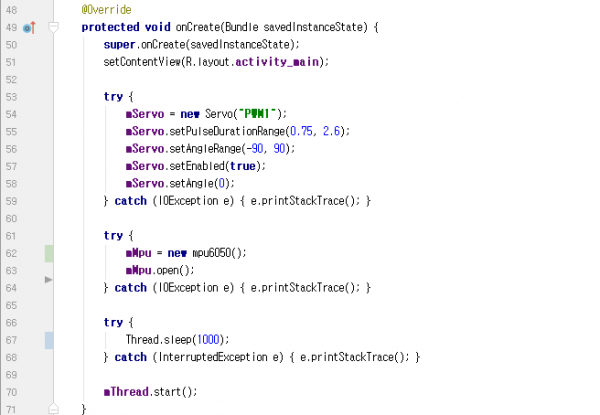
서보 클래스 객체와 MPU6050 클래스 객체는 다음과 같이 초기화 합니다. 서보는 최초 위치가 0도가 되도록하며, 모터가 회전하는 시간 여유를 위해 1초를 대기합니다. 앞서 정리한 서보 모터 제어 방법을 다시 정리해보면, PWM의 주파수는 50㎐, 주기가 20㎳에 PWM의 폭이 1㎳ 일 때 -90도, 2㎳ 일 때 90도, 1.5㎳ 일 때 0도 입니다. 이것을 서보 클래스를 초기화할 때 펄스폭은 1~2㎳, 각도 폭은 -90~90도로 설정해줍니다. 문제는 펄스폭 부분이 정확히 맞지가 않습니다. 심지어 같은 SG90 서보 모터인데도 서로 조금씩 다릅니다. 아래 코드는 필자가 값을 조금씩 바꿔보면서 맞춘 것으로 펄스폭이 원래 1~2㎳이어야 했던 것을 0.75~2.6㎳로 조정했습니다. 여러분들도 실제 하시려면 값을 조금 조정하셔야 할 것입니다.
try { mServo = new Servo("PWM1"); mServo.setPulseDurationRange(0.75, 2.6); mServo.setAngleRange(-90, 90); mServo.setEnabled(true); mServo.setAngle(0); } catch (IOException e) { e.printStackTrace(); }
try { mMpu = new mpu6050(); mMpu.open(); } catch (IOException e) { e.printStackTrace(); }
try { Thread.sleep(1000); } catch (InterruptedException e) { e.printStackTrace(); }
mThread.start();

처음 멤버 객체/변수 작성 부분에서 비워놓았던 While 문 내부를 여기서 채우도록 하겠습니다. Servo 클래스의 setAngle 함수를 이용해서 서보 모터의 각도값을 입력해줍니다. 아래와 같이 쓰레드 함수 내부를 작성해 줍니다.
Thread mThread = new Thread() { public void run() { timepre = System.nanoTime(); while (true) { try { long timecur = System.nanoTime(); float GyroZ = mMpu.getGyroZ(); float dt = (float)((timecur - timepre) / 1000000000.); timepre = timecur; angle -= GyroZ * dt; angle = Math.max(-90, (Math.min(90, angle)));
mServo.setAngle(angle);
Log.i(TAG, String.format("Time = %f Angle = %f", dt, angle)); } catch (IOException e) { e.printStackTrace(); }
try { Thread.sleep(10); } catch (InterruptedException e) { e.printStackTrace(); } } } }; 
System.nanoTime()은 나노 단위로 시간을 측정하는데 사용되는 함수입니다. 루프가 한바퀴 도는 시간을 측정하며, 이 시간을 각속도에 곱한 것이 적분이며, 회전한 각도가 되게 됩니다. 시간을 측정하면 현재시간 timecur를 이전 시간 timepre에 저장합니다. 서보 클래스 객체는 각도범위를 넘는 값을 입력하면 에러가 나서 멈추게 되므로 30번 줄과 같이 각도값이 -90보다 작거나 90보다 크게되지 않도록 해줍니다. 전체 코드는 아래와 같습니다.
import android.os.Bundle; import android.support.v7.app.AppCompatActivity; import android.util.Log; import com.google.android.things.contrib.driver.pwmservo.Servo; import java.io.IOException; import mechasolution.mpu6050.mpu6050;
public class MainActivity extends AppCompatActivity { private static final String TAG = MainActivity.class.getSimpleName();
float angle = 0; long timepre = 0; private Servo mServo; private mpu6050 mMpu; Thread mThread = new Thread() { public void run() { timepre = System.nanoTime(); while (true) { try { long timecur = System.nanoTime(); float GyroZ = mMpu.getGyroZ(); float dt = (float)((timecur - timepre) / 1000000000.); timepre = timecur; angle -= GyroZ * dt; angle = Math.max(-90, (Math.min(90, angle)));
mServo.setAngle(angle);
Log.i(TAG, String.format("Time = %f Angle = %f", dt, angle)); } catch (IOException e) { try { mMpu.close(); mMpu.open(); } catch (IOException e1) { e1.printStackTrace(); }
try { Thread.sleep(1000); } catch (InterruptedException e1) { e1.printStackTrace(); } e.printStackTrace(); }
try { Thread.sleep(10); } catch (InterruptedException e) { e.printStackTrace(); } } } };
@Override protected void onCreate(Bundle savedInstanceState) { super.onCreate(savedInstanceState); setContentView(R.layout.activity_main);
try { mServo = new Servo("PWM1"); mServo.setPulseDurationRange(0.75, 2.6); mServo.setAngleRange(-90, 90); mServo.setEnabled(true); mServo.setAngle(0); } catch (IOException e) { e.printStackTrace(); }
try { mMpu = new mpu6050(); mMpu.open(); } catch (IOException e) { e.printStackTrace(); }
try { Thread.sleep(1000); } catch (InterruptedException e) { e.printStackTrace(); }
mThread.start(); } }
|