LED 신발만들기
페이지 정보
작성자 소피아 작성일16-06-10 15:07 조회5,168회 댓글0건첨부파일
-
 20160610_142426.wmv
(735.1K)
58회 다운로드
DATE : 2016-06-10 15:07:34
관련링크
본문
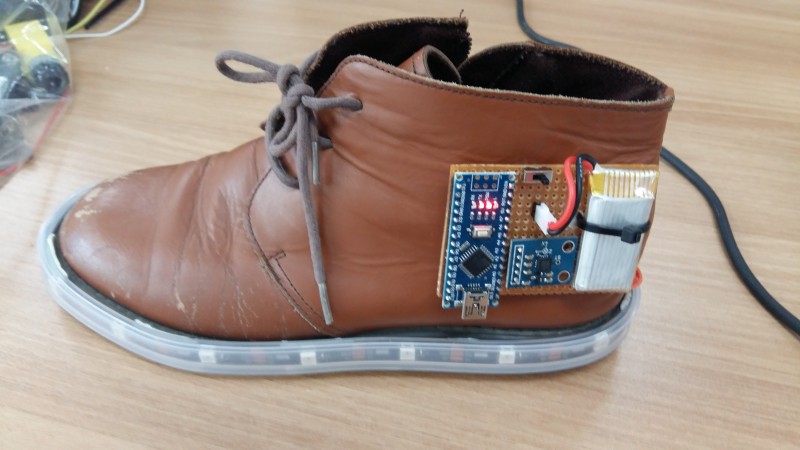
네오픽셀led를 이용해 LED신발을 만들어 보았습니다.
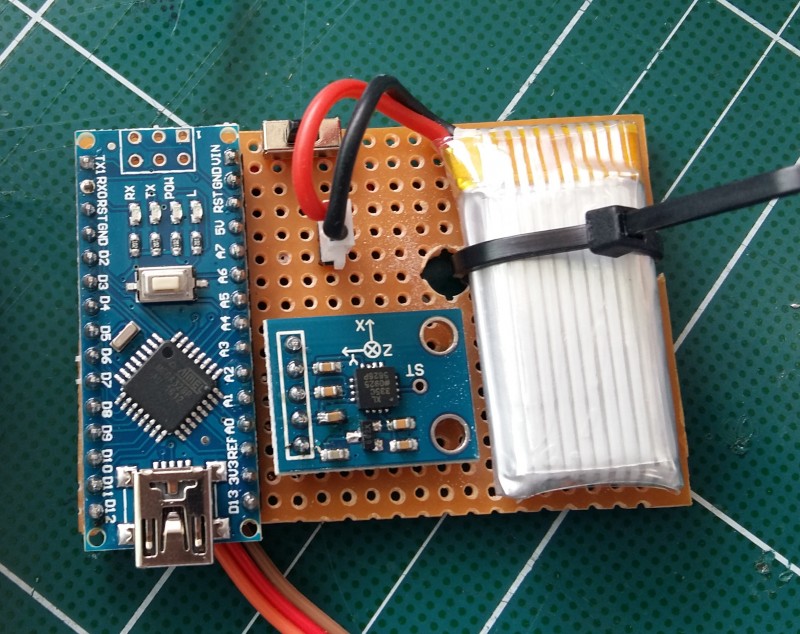
재료 : GY-61 ADXL335 3축 가속도 센서, 아두이노 나노보두, 네오픽셀LED, FLVHQPXJFL 30-.7v 380mAH , 스위치
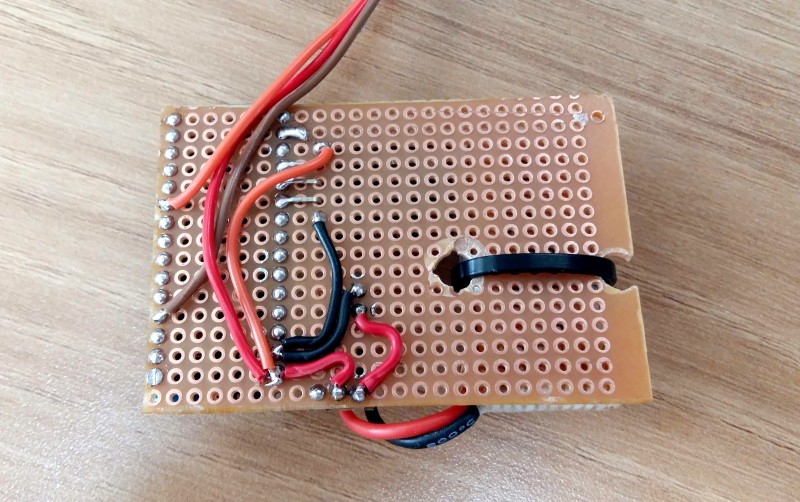
<뒷면>
<앞면>
< 소스 >
#include <Adafruit_NeoPixel.h>
#ifdef __AVR__
#include <avr/power.h>
#endif
// Which pin on the Arduino is connected to the NeoPixels?
// On a Trinket or Gemma we suggest changing this to 1
#define PIN 7
// How many NeoPixels are attached to the Arduino?
#define NUMPIXELS 15
// When we setup the NeoPixel library, we tell it how many pixels, and which pin to use to send signals.
// Note that for older NeoPixel strips you might need to change the third parameter--see the strandtest
// example for more information on possible values.
Adafruit_NeoPixel pixels = Adafruit_NeoPixel(NUMPIXELS, PIN, NEO_GRB + NEO_KHZ800);
int delayval = 100; // delay for half a second
int xacc = 0;
int yacc = 0;
int zacc = 0;
// pin number
int xpin = 0;
int ypin = 1;
int zpin = 2;
void setup() {
// This is for Trinket 5V 16MHz, you can remove these three lines if you are not using a Trinket
#if defined (__AVR_ATtiny85__)
if (F_CPU == 16000000) clock_prescale_set(clock_div_1);
#endif
// End of trinket special code
pixels.begin(); // This initializes the NeoPixel library.
// for debuggging
Serial.begin(9600);
}
void loop() {
// reading sensor data
xacc = analogRead(xpin);
yacc = analogRead(ypin);
zacc = analogRead(zpin);
//calculation of norm, xacc is not an actual acceleration
int norm = sqrt(xacc^2+yacc^2+zacc^2);
Serial.println(norm); // norm check
// For a set of NeoPixels the first NeoPixel is 0, second is 1, all the way up to the count of pixels minus one.
if (norm > 28) // 28 is the threshold
{
for(int i=0;i<NUMPIXELS;i++){
// pixels.Color takes RGB values, from 0,0,0 up to 255,255,255
pixels.setPixelColor(i, pixels.Color(150,150,150)); // Moderately bright green color.
pixels.show(); // This sends the updated pixel color to the hardware.
delay(50); // Delay for a period of time (in milliseconds).
}
delay(1000);
}
else
{
for(int i=0;i<NUMPIXELS;i++){
// pixels.Color takes RGB values, from 0,0,0 up to 255,255,255
pixels.setPixelColor(i, pixels.Color(0,0,0)); // Moderately bright green color.
pixels.show(); // This sends the updated pixel color to the hardware.
//delay(delayval); // Delay for a period of time (in milliseconds).
}
}
}
댓글목록
등록된 댓글이 없습니다.


최신댓글